Using Razor Outside of Web
Repurposing the Razor Templating Engine to Generate HTML in a Console Application

I am a highly motivated and innovative software engineer with almost a decade of professional experience in software design and development. My main interests include architecting performant cloud-native solutions and optimizing the development experience for myself and my colleagues. I have extensive knowledge and understanding of the .NET ecosystem, including ample expertise in cloud technologies such as Microsoft Azure. In my spare time, I enjoy improving myself and the community by contributing to free and open-source software.
Let's start.Razor is a markup syntax for creating dynamic web pages in C#. It has been a part of the ASP.NET MVC framework since early 2011 and is currently a part of ASP.NET Core, serving as a templating engine for building web pages and components in MVC, Razor, and Blazor.
The primary idea behind Razor is to provide a simple syntax for generating HTML using a code-focused templating approach. The same approach can be seen in other popular frameworks and libraries focusing on HTML generation, such as React, Angular, Vue, etc. The described approach uses a hybrid of markup syntax (in this case, HTML) and a programming language (C# for Razor). It combines them during rendering to provide a hydrated and fully rendered web page or a page segment.
Let's get visual. Let's say we want to create a simple <div> with some populated data.
<div>
    <p><b>Name:</b> Denis</p>
    <p><b>Surname:</b> Ekart</p>
</div>
The same thing could be achieved in a .razor component in the following way.
<div>
    <p><b>Name:</b> @Name</p>
    <p><b>Surname:</b> @Surname</p>
</div>
}
@code {
    [Parameter]
    public string Name { get; set; } = "Denis"

    [Parameter]
    public string Surname { get; set; } = "Ekart"
}
The same HTML markup will be generated after the Razor templating engine renders this code. Only now we can provide the rendering engine with additional context (Name and Surname , in this case), which can render dynamic components based on the information provided. Now, scale this approach to the entire website, and you know how Razor works (in a nutshell 🥜).
Rendering web pages is cool and all, but this is not what we're here to do today. We want to (ab)use the Razor rendering engine to render HTML inside a console application.
Why? Well, first of all, because since .NET 8 onwards, we can. But more seriously, there are various use cases where rendering HTML can be used and useful outside of an HTTP request. Generating static website content, structuring rich email messages, and generating PDFs are just a few worthy mentions where templating comes in handy.
Since I've been dealing with a clunky HTML snippet, any time I send out a newsletter for our developer user group, let's convert that into a Razor template (and make my life a little easier).
Let's start
We are going to create an empty console application that's targeting .net8.
dotnet new console -n ConsoleRazorRenderer
If you have .net8 installed, the created ConsoleRazorRenderer.csproj will look something like this.
<Project Sdk="Microsoft.NET.Sdk">
    <PropertyGroup>
        <OutputType>Exe</OutputType>
        <TargetFramework>net8.0</TargetFramework>
        ...
    </PropertyGroup>
</Project>
Great. Let's modify our project to allow us to include razor files. We will first need to change the project SDK to import the Razor-specific toolset. Open up the ConsoleRazorRenderer.csproj project file and change the <Project Sdk="Microsoft.NET.Sdk"> to Microsoft.NET.Sdk.Razor.
We will also need a couple of external dependencies.
dotnet add package Microsoft.AspNetCore.Components.Web will add the services needed to render the Razor components in our console application.
Additionally, we require dotnet add package Microsoft.Extensions.Logging since the rendering engine depends on the types defined in this package.
Our project file should now look like this.
<Project Sdk="Microsoft.NET.Sdk.Razor">
    <PropertyGroup>
        <TargetFramework>net8.0</TargetFramework>
        ...
    </PropertyGroup>
    <ItemGroup>
        <PackageReference Include="Microsoft.AspNetCore.Components.Web" Version="8.0.1"/>
        <PackageReference Include="Microsoft.Extensions.Logging" Version="8.0.0"/>
    </ItemGroup>
</Project>
Okay, It's smooth sailing from here. Let's add our NewsletterComponent.razor file to the project and fill it up with the newsletter HTML we've been using so far. Feel free to look at the HTML in the repository, but to get a general idea, this is what the final product should look like.
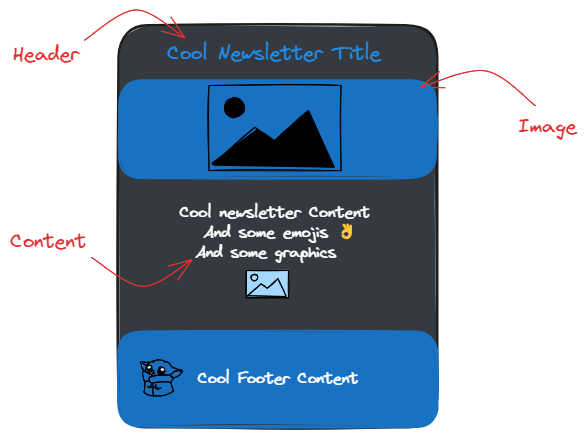
I'm really sorry for my mad drawing skillz.
We can Identify three variables that will change in any future newsletter version. The title, attached graphics, and the actual content of the newsletter. We can make these dynamic by parametrizing our components.
@code {
    [Parameter]
    public string? EventTitle { get; set; }
    [Parameter]
    public string? HeadingImageUrl { get; set; }
}
The interesting thing here is the actual content of the newsletter. It makes sense that the content of a newsletter will require rich text features (you know, emojis ✨, formatting, and other appealing features). Let's allow the component to accept any arbitrary HTML snippet as the Content.
Obviously, the renderer will not allow us to inject any arbitrary string and render it as HTML without escaping it. This is where the MarkupString comes in handy.
@code {
    [Parameter]
    public MarkupString? Content { get; set; }
}
It allows us to inject raw HTML markup into our components.
If we translate everything above into Razor, we can generate a component (or multiple components) that will look something like the following.
The wrapping component NewsletterComponent.razor will be used as a top-level component containing our styling, content, and graphics.
<!DOCTYPE HTML
PUBLIC "-//W3C//DTD XHTML 1.0 Transitional //EN" "http://www.w3.org/TR/xhtml1/DTD/xhtml1-transitional.dtd">
<html xmlns="http://www.w3.org/1999/xhtml" lang="en">
    <head>
        <meta http-equiv="Content-Type" content="text/html; charset=UTF-8">
        <meta name="viewport" content="width=device-width, initial-scale=1.0">
        <title>SloDug Newsletter | @Content?.Title</title>

        <style type="text/css">
            ...
        </style>
    <body>
        <div>
            ...
            <NewsletterContentComponent Content="@Content?.Content" EventTitle="@Content?.Title" HeadingImageUrl="@Content?.HeadingImageUrl" />
        </div>
        <div>
            ...
            <NewsletterTrailerComponent />
        </div>
    </body>
</html>

@code {
    public record NewsletterDto(string? Title, MarkupString? Content, string? HeadingImageUrl);

    [Parameter]
    public NewsletterDto? Content { get; set; }
}
NewsletterContentComponent.razor and NewsletterTrailerComponent.razor will hold dynamic content that will be rendered. While NewsletterTrailerComponent will wrap the static footer of our newsletter (not interesting), the NewsletterContentComponent will be used to format our dynamic content into HTML.
While there are numerous ways to structure the component hierarchy for any content, that's not the fun part of the article. Let's see how we can render our creation.
We will use the HtmlRenderer to output the generated HTML as a string.
Let's first define a rendering service, which will take the NewsletterDto we defined earlier and produce a rendered HTML string.
public class NewsletterRenderer(HtmlRenderer renderer)
{
    public async Task<string> RenderHtml(NewsletterComponent.NewsletterDto content)
    {
        var result = await renderer.Dispatcher.InvokeAsync(async () =>
        {
            var parameters = ParameterView.FromDictionary(new Dictionary<string, object?>
            {
                { "Content", content }
            });
            var output = await renderer.RenderComponentAsync<NewsletterComponent>(parameters);

            return output.ToHtmlString();
        });

        return result;
    }
}
The service will receive a HtmlRenderer injected into the constructor (check out C# 12 primary constructors). We invoke the renderer using its dispatcher to render the NewsletterComponent. All we need now is to supply the renderer with the dynamic content, so we will construct a ParameterView from the content the component expects - the "Content" parameter expects an object of type NewsletterDto.
The RenderComponentAsync method call will return a HtmlRootComponent , which contains the rendering result and has a handy ToHtmlString method. Now that we have our HTML output, we need to return it to the caller.
It's that simple. Now, let's put it all together. In the Program.cs entrypoint, we will create a ServiceCollection, add the necessary services, and build our DI container.
var provider = new ServiceCollection()
    .AddLogging()
    .AddTransient<HtmlRenderer>()
    .AddTransient<NewsletterRenderer>()
    .BuildServiceProvider();
Microsoft.Extensions.Hosting NuGet package and supply the needed services to the host builder.Now that we have our service provider, we can resolve the renderer by calling
var renderer = provider.GetRequiredService<NewsletterRenderer>();
The only thing left is to define our content and render the HTML.
var content = new NewsletterComponent.NewsletterDto(
    Title: "Pre NTK - DevOps Edition",
    // language=html
    Content: new("""
                 (...)
                 <div>
                     🗓️ WHEN: Wednesday, January 17th 2024, at 6PM <br />
                     📍 WHERE: BTC City Ljubljana <br />
                     🔗 <a ...>Sign up here</a> <br />
                 </div>
                 (...)
                 """),
    HeadingImageUrl: "https://slodug.blob.core.windows.net/uploads/a9424857-0326-49a4-bbb0-b89ecb9a1038/SloDug_wide_empty.png");

var newsletterHtml = await renderer.RenderHtml(content);
// send the newsletter to subscribers (or something)
And that's it. We can now render dynamic content using the Razor rendering engine. This also allows us to reuse existing components we use throughout our web application, making things even easier.
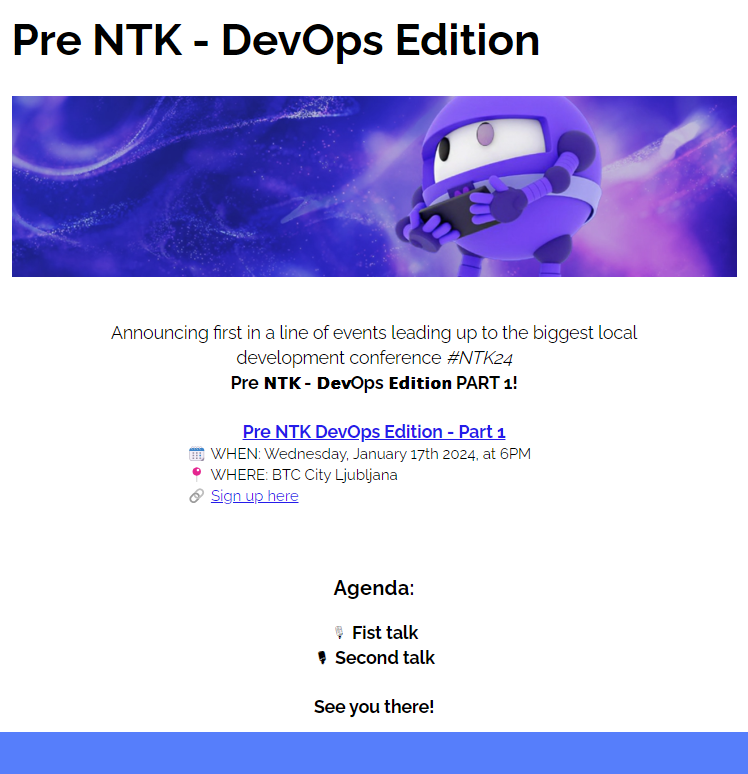
Newsletter sent!
Don't forget to check out the repository for a complete sample.
✌️